
Adobe Lightroom, a cornerstone application for photographers worldwide, has undergone numerous enhancements to optimize its speed and performance over the years. However, many users, particularly those working with PC or Intel chipsets, frequently report a recurring issue of Lightroom becoming sluggish. This article aims to provide a comprehensive guide, detailing ten actionable tips designed to significantly boost Lightroom’s performance and elevate editing efficiency, all without necessitating an immediate hardware upgrade.
Before delving into specific optimizations, it is crucial to ensure that your Lightroom installation is up-to-date. Running the latest version often incorporates performance improvements and bug fixes directly from Adobe. This fundamental step can resolve many underlying issues before more advanced troubleshooting is required.
While the primary focus of these recommendations is software-based optimization, a brief acknowledgment of hardware’s role is warranted. The advent of Apple’s M-Series chips has been a notable development, with many users reporting a dramatic improvement in Lightroom Classic’s responsiveness on these platforms. This observation suggests that software optimization can indeed be hardware-dependent, but the following tips are designed to maximize performance on existing configurations, regardless of chipset. The goal is to empower photographers to achieve a smoother workflow and unlock greater productivity within their current setup.
Optimizing Lightroom Performance: Essential Settings and Practices
The following four tips represent foundational practices that should be integrated into every Lightroom user’s workflow. Implementing these consistently will yield immediate improvements in editing speed and overall efficiency.

Tip #1: Leverage GPU Acceleration for Enhanced Processing
A critical, yet often overlooked, setting within Lightroom is the Graphics Processing Unit (GPU) acceleration. To access this, navigate to Preferences (Ctrl+, on Windows, Cmd+, on Mac) and select the "Performance" tab. Within this tab, locate the "Use Graphics Processor" dropdown menu. While it may default to "Auto," changing this setting to "Custom" unlocks more granular control. From there, ensure the checkbox for "Use GPU for image processing" is enabled. This action should trigger an alert confirming that "Full graphics acceleration is enabled."
It is advisable to verify that your graphics card is supported by Lightroom. The "Learn More" button within this section provides access to Adobe’s compatibility information. Furthermore, before enabling GPU acceleration, it is highly recommended to update your graphics card drivers to the latest available version. Outdated drivers can often be a source of performance bottlenecks and compatibility issues. Modern GPUs, even mid-range ones, can significantly offload image processing tasks from the CPU, leading to a noticeable increase in rendering speed, especially when applying complex edits or working with high-resolution images. The computational power of a GPU in parallel processing can drastically reduce the time taken for tasks such as applying filters, adjusting colors, and rendering previews.
Tip #2: Strategic Catalog and Image Storage for Optimal Speed
The physical location of your Lightroom catalog and the images you are actively editing plays a pivotal role in performance. For maximum efficiency, your Lightroom Classic catalog should reside on the same drive as the images it references. Crucially, this drive should be the fastest storage solution available to you. Solid State Drives (SSDs), and particularly NVMe SSDs, offer substantial read and write speeds compared to traditional Hard Disk Drives (HDDs).
If you are utilizing an external SSD, ensure it is connected via the fastest available port, such as USB-C. A common performance bottleneck arises when catalogs and images are stored on slower, disparate drives, or on Network Attached Storage (NAS) devices that may not offer sufficient bandwidth for real-time editing. This tip alone has been known to resolve the majority of performance complaints for users working with slower storage solutions.
For instance, a photographer might maintain a 2TB NVMe SSD for their active projects and Lightroom catalogs. Within this drive, organizing work into client-specific folders, with both the catalog file (.lrcat) and the original RAW files housed within each respective client folder, ensures that Lightroom can access all necessary data with minimal latency. This hierarchical organization not only aids in quick retrieval but also minimizes the physical distance data needs to travel.

Tip #3: Maximizing Raw Cache Size for Swift Preview Generation
The Raw Cache in Lightroom stores previews of your RAW images, allowing for faster display and manipulation in the Develop module. Optimizing its size and location is key. Navigate to Preferences > Performance. For the "Camera Raw Cache Folder," select your fastest internal drive, which can be the same drive where your catalogs are stored. Subsequently, increase the "Maximum Size" to 100 GB. This ample space ensures that the cache has sufficient capacity to store a wide range of previews and cache files, accommodating variations in image sizes and complexity. While 100 GB is a conservative recommendation, the optimal size may vary depending on the typical resolution and file format of your RAW images. A larger cache can significantly reduce the time it takes to generate previews, especially when culling large batches of photos or switching between images.
Tip #4: Pre-Rendering Previews for a Seamless Editing Workflow
A crucial step often overlooked is the rendering of previews before commencing culling or editing. While previews can be generated during the import process, creating 1:1 previews can be time-consuming. Therefore, an alternative is to import your images first and then manually render 1:1 and Smart Previews from the Library module’s "Previews" menu.
Rendering previews beforehand ensures that when you navigate through your images or apply edits, Lightroom is not simultaneously engaged in generating these previews. This preemptive action dramatically speeds up the browsing experience and the initial application of edits, as the necessary preview data is readily available. Smart Previews, in particular, are lightweight proxies of your RAW files that allow for quick editing and syncing across devices without needing access to the original, often massive, RAW files.
Advanced Techniques for Further Performance Gains
Beyond the fundamental optimizations, several other settings and workflow adjustments can further enhance Lightroom’s speed and responsiveness.
Tip #5: Utilizing Smart Previews for Accelerated Editing
If, after implementing the initial four tips, Lightroom Classic still exhibits sluggishness during editing, consider enabling the "Use Smart Previews instead of Originals for image editing" option. This setting, found in Preferences > Performance > Develop, is particularly beneficial when working with very large RAW files or on less powerful systems. Smart Previews are significantly smaller and optimized for editing, allowing Lightroom to load and process them much faster than full-resolution originals. While this may introduce a slight perceived drop in visual quality within the Develop module, it’s important to note that this effect is temporary and does not impact the final exported image quality. The speed advantage gained in image-to-image editing and applying adjustments can be substantial.

Tip #6: Adjusting Standard Preview Resolution
Lightroom’s default standard preview size resolution is often set higher than necessary, especially for users with lower-resolution monitors. Reducing this setting can lead to a noticeable performance improvement. Access this by going to Catalog Settings (Alt+Ctrl+, on Windows, Opt+Cmd+, on Mac) and selecting the "File Handling" tab. Unlike general preferences, these settings are catalog-specific and must be adjusted for each catalog. A recommended setting for the "Standard Preview Size" is 1680 pixels. This optimization reduces the amount of data Lightroom needs to process and display for standard previews, leading to quicker rendering and navigation.
Tip #7: Disabling Automatic XMP Writes
Unless you have a specific, critical need for sidecar XMP files, it is strongly advised to disable the "Automatically write changes into XMP" option. This setting, found in Catalog Settings > Metadata, causes Lightroom to create a separate .xmp file for every edit made to an image, in addition to storing the changes within the catalog itself. This essentially doubles the read/write operations on your storage drive, which can significantly impact performance, especially on slower drives. While XMP files can serve as a backup if your catalog becomes corrupted, regular catalog backups are a more efficient and less performance-impacting alternative for data redundancy. Disabling this feature will streamline write operations and contribute to a snappier Lightroom experience.
Tip #8: Selective Disablement of Face Detection
The Automatic Face Detection feature, located in Catalog Settings > Metadata, utilizes artificial intelligence to scan images and identify faces. This process can be CPU-intensive, consuming significant processing power. For many photographers, this feature may not be essential for their daily workflow. Disabling it can free up valuable CPU resources, leading to improved overall performance. It is important to remember that this feature can be re-enabled when needed for specific tasks, such as organizing portraits. The impact of disabling face detection is most pronounced on systems with older or less powerful CPUs.
Tip #9: Segmenting Workloads with Individual Catalogs
For photographers managing large volumes of images, particularly in event, wedding, or portrait photography, dividing their work into separate, individual catalogs can dramatically enhance Lightroom’s speed and performance. While later versions of Lightroom have improved their ability to handle larger catalogs, older versions can experience significant slowdowns with catalogs exceeding 20,000 images. By creating a new catalog for each client shoot or project, you reduce the computational load on Lightroom, making it more responsive.
This approach also offers practical benefits for studios with multiple editors. Separating catalogs allows editors to work on different projects simultaneously without interfering with each other’s workflows. Furthermore, smaller, project-specific catalogs stored alongside their respective image folders can simplify archiving and network transfers. While this organizational strategy requires a shift in workflow, the performance gains and organizational advantages can be substantial, particularly for high-volume studios.

Tip #10: Strategic Hardware Investment for Peak Performance
If, after meticulously implementing all software-based optimizations, Lightroom’s performance remains unsatisfactory, it may be time to consider hardware upgrades. The primary hardware components that influence Lightroom’s speed are the Central Processing Unit (CPU), the hard drive, and the Graphics Processing Unit (GPU).
When selecting a CPU for Lightroom, prioritize higher clock speeds over a greater number of cores. Lightroom is not optimally designed to leverage a large number of CPU cores; therefore, a CPU with fewer cores but a higher clock speed will generally yield better performance. It is worth reiterating that for an optimized Lightroom experience, Apple’s M-Series chips have demonstrated superior performance compared to many Intel-based systems.
For storage, the fastest possible drive is paramount. An internal SSD or NVMe drive is ideal for housing both catalogs and active image files, ensuring rapid read and write times for cache and preview data. External USB drives, particularly older generations, can introduce significant performance bottlenecks and should be avoided for active editing.
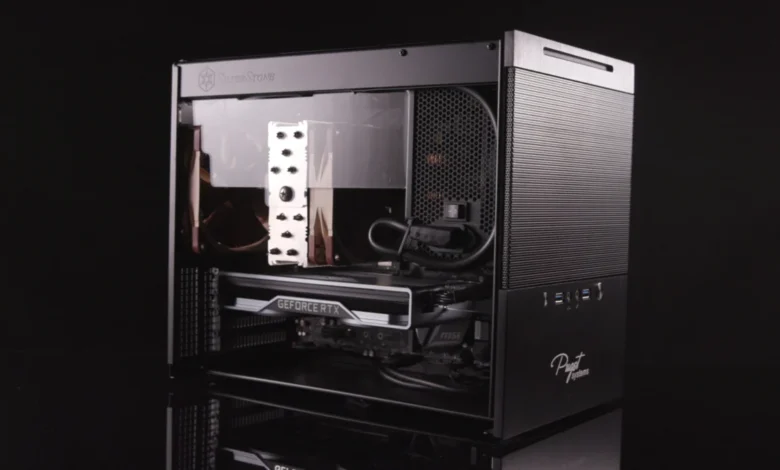
Regarding the GPU, opt for a graphics card that offers full acceleration for image processing. For users looking to build a custom PC powerhouse, resources from specialized hardware reviewers like Puget Systems can offer valuable insights into component compatibility and performance benchmarks for creative applications. For those who prefer a pre-built solution and are comfortable with macOS, an iMac Pro equipped with a powerful GPU can provide an excellent out-of-the-box experience.
By systematically applying these ten tips, photographers can significantly enhance their Lightroom performance, leading to a more efficient and enjoyable editing workflow without the immediate need for costly hardware upgrades. The key lies in understanding how software settings and workflow practices interact with your existing hardware to unlock its full potential.