
How to Speed Up Lightroom Performance and Increase Editing Efficiency Without Upgrading Your Hardware

Adobe has consistently strived to enhance the speed and performance of Lightroom over the years. However, many users, particularly those on PC or Intel chipsets, find that Lightroom can become sluggish over time, hindering their editing workflow. This comprehensive guide offers ten practical tips designed to significantly boost Lightroom’s performance and elevate editing efficiency, often without the need for costly hardware upgrades.
Before delving into the optimization strategies, it is crucial to ensure that Lightroom is updated to its latest version. Adobe frequently releases updates that include performance improvements and bug fixes, which can often resolve underlying speed issues.
Re-evaluating Hardware Upgrade Urgency: The Apple Silicon Advantage
Many photographers facing slow Lightroom performance immediately consider investing in new, more powerful computers. However, the following tips focus primarily on software optimizations and workflow adjustments that can yield substantial improvements. It’s worth noting a significant development in recent years: the introduction of Apple’s M-Series chips. Anecdotal evidence and performance tests consistently show that Lightroom Classic exhibits remarkably enhanced performance on Apple silicon-based Macs. Many users have reported that transitioning to an M-series Mac has entirely resolved their speed issues. While this article does not advocate for switching operating systems, understanding this hardware-software synergy is important context. The goal here is to provide actionable guidance for optimizing Lightroom Classic on any platform.
Core Optimization Strategies for Immediate Gains
The initial set of tips are foundational practices that every Lightroom user should implement to ensure immediate improvements in editing efficiency.

Tip #1: Leverage Custom GPU Acceleration
The Graphics Processing Unit (GPU) plays a vital role in accelerating image processing within Lightroom. Ensuring it’s optimally configured is paramount.
Navigate to Lightroom’s Preferences (Ctrl+, on Windows or Cmd+, on Mac) and select the "Performance" tab. Within the "General" section, locate the "Use Graphics Processor" dropdown menu. Instead of leaving it on "Auto," change this setting to "Custom." This action will reveal additional options. Crucially, toggle the checkbox for "Use GPU for image processing." A confirmation alert should appear, indicating that "Full graphics acceleration is enabled."
For users who wish to verify their graphics card’s compatibility or compatibility status, a "Learn More" button is provided, linking to Adobe’s support pages detailing supported GPUs.
Crucial Pre-Configuration Note: Before enabling GPU acceleration, it is highly recommended to update your graphics card drivers to the latest available version. Outdated drivers can often lead to performance bottlenecks and compatibility issues.
Tip #2: Optimize Catalog and Image Storage for Speed
The location and type of storage for your Lightroom catalog and your image files have a profound impact on performance. For optimal speed, your Lightroom catalog and the images it references should reside on the same, fastest available internal drive.
Solid State Drives (SSDs) and NVMe drives are significantly faster than traditional Hard Disk Drives (HDDs). If you are using an external SSD, ensure it is connected via your fastest port, typically USB-C, to maximize data transfer rates. This is often the most critical bottleneck for Lightroom Classic’s performance. For many users, resolving this single issue can dramatically alleviate sluggishness, especially for those working with slow drives or Network Attached Storage (NAS).
A common and effective organizational strategy involves storing both the catalog and the original image files within a dedicated folder for each client or project. This not only keeps your workflow organized but also ensures that Lightroom can access all necessary data with minimal delay. For example, a "ClientName_ShootDate" folder could house the catalog file (.lrcat) and all associated RAW or JPEG files.

Tip #3: Maximize Raw Cache Size for Enhanced Responsiveness
The Raw Cache stores previews and temporary files that Lightroom uses to speed up image loading and editing. Allocating sufficient space to this cache is essential.
Within Lightroom’s Preferences, navigate to the "Performance" tab and locate the "Camera Raw Cache Settings." It is strongly advised to designate the Raw Cache folder to your fastest internal drive, which can be the same drive where your catalogs are stored. Then, set the "Maximum Size" to a generous 100 GB. This ample allocation ensures that the cache has enough capacity to store a wide variety of previews and cache files, thereby reducing the need for Lightroom to regenerate them frequently. While 100 GB is a safe baseline, the optimal size may vary depending on the typical resolution and file size of your raw images.
Tip #4: Prioritize Preview Rendering Before Culling and Editing
The process of rendering previews, particularly 1:1 previews, can be time-consuming. However, completing this step before engaging in culling or detailed editing significantly improves the responsiveness of the Library and Develop modules.
While previews can be rendered during the import process, 1:1 previews can require a substantial amount of time. An alternative and often more efficient approach is to import your images, and then subsequently render 1:1 and Smart Previews from the Library module by navigating to "Library" > "Previews" > "Build 1:1 Previews" or "Build Smart Previews." This ensures that when you begin working on your images, Lightroom has readily available high-resolution previews, leading to a smoother editing experience.
Optional but Recommended Enhancements for Further Optimization
The following tips offer additional layers of optimization that can further refine Lightroom’s performance, particularly for users who still experience occasional slowdowns.
Tip #5: Harness the Power of Smart Previews During Editing
If, after implementing the preceding tips, you still encounter sluggishness while editing, consider enabling the use of Smart Previews. Smart Previews are significantly smaller in file size and resolution compared to original RAW files, allowing for much faster image loading and manipulation, especially in the Develop module.

In the "Performance" tab of Lightroom’s Preferences, scroll down to the "Develop" section. Toggle the checkbox that reads "Use Smart Previews instead of Originals for image editing." While this may result in a slight perceived decline in image quality when viewing in the Develop module, it’s important to remember that your exported images will retain their original quality. This setting is particularly beneficial for photographers who work with very large RAW files or have less powerful hardware.
Tip #6: Optimize Standard Preview Resolution
Lightroom often defaults to a standard preview resolution that exceeds what is necessary for most monitor setups. Reducing this resolution can lead to a noticeable performance boost.
Access your Catalog Settings by pressing Alt+Ctrl+, on Windows or Option+Cmd+, on Mac. Navigate to the "File Handling" tab. Unlike the general Preferences, these settings are catalog-specific, meaning any changes made here will need to be applied to each catalog individually. Reduce the "Standard Preview Size" from its default setting to 1680 pixels. This ensures that Lightroom generates previews that are appropriately sized for your display, reducing the processing load and speeding up image rendering.
Tip #7: Disable Automatic XMP Write-Back for Improved Drive Performance
The "Automatically write changes into XMP" setting can create a significant overhead on your storage drives. Unless you have a specific, compelling reason to use this feature, it is best to disable it.
When this option is enabled, Lightroom writes every adjustment made to an image not only to the catalog but also to a separate XMP sidecar file. This effectively doubles the read/write operations on your drive, which can be a major performance impediment. To disable this, go to your Catalog Settings, select the "Metadata" tab, and uncheck the "Automatically write changes into XMP" option.
While XMP files can serve as a backup if your catalog becomes corrupted, regular catalog backups are a more efficient and robust method of data protection. Unless you require XMPs for integration with other software or specific workflows, keeping this option off will significantly improve Lightroom’s speed.
Tip #8: Deactivate Automatic Face Detection
The automatic face detection feature in Lightroom, while useful for organizing portraits, consumes considerable CPU resources. Lightroom employs AI algorithms to scan through images and identify faces, a process that can be computationally intensive.

Within the "Metadata" tab of your Catalog Settings, you will find the "Face Detection" option towards the bottom. For many users, turning this feature off by default can free up significant processing power. You can always manually trigger face detection for specific folders or shoots when needed, ensuring that this resource-intensive process only runs when it’s actively required.
Tip #9: Segment Large Workloads with Individual Catalogs
For photographers who manage extensive libraries of images from various client shoots—such as wedding, event, or portrait photographers—segmenting your work into individual catalogs can dramatically improve Lightroom’s speed and performance.
While later versions of Lightroom have improved their handling of large, consolidated catalogs, older versions can experience significant slowdowns with catalogs exceeding 20,000 images. By creating separate catalogs for each shoot or client, you reduce the overall load on Lightroom, leading to faster navigation and editing. This is particularly noticeable on PC systems, where large, single catalogs tend to degrade performance more severely compared to Mac counterparts, which often exhibit greater resilience.
Beyond performance, separating catalogs offers several workflow advantages. For studios with high image volumes, smaller catalogs stored alongside their respective image folders facilitate easier archiving and network transfers. Furthermore, it enables multiple editors to work on different projects concurrently without interfering with each other’s workflows. This strategy is a workflow decision that requires an assessment of your specific needs and preferences.
Tip #10: Strategic Hardware Investments for Maximum Impact
If, after implementing all software and workflow optimizations, you are still experiencing persistent sluggishness, it is time to consider hardware upgrades. However, these should be targeted investments.
CPU: When selecting a new CPU, prioritize higher clock speeds over a greater number of cores. Lightroom Classic is not heavily optimized to utilize a large number of cores; therefore, a processor with fewer cores but a higher clock speed will generally yield better performance. As previously mentioned, for the absolute best experience with Lightroom Classic, Apple silicon remains a highly recommended option due to its synergistic performance characteristics.
Hard Drive: The speed of your storage drive is paramount. For optimal Lightroom performance, utilize the fastest possible storage for your catalogs. An internal SSD or NVMe drive is ideal, providing rapid read and write speeds essential for quick file access, cache generation, and preview creation. Avoid external USB drives for catalog and active project storage, as they will invariably introduce significant performance bottlenecks.

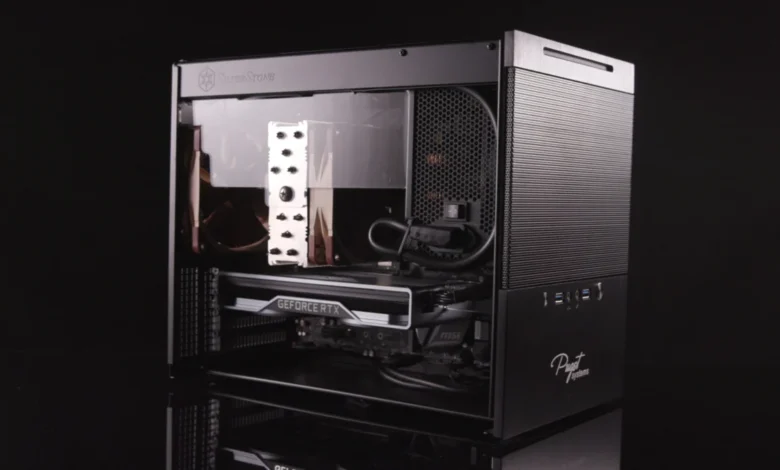
GPU: A graphics card that supports full hardware acceleration for image processing is crucial. For users building custom PCs, resources from companies like Puget Systems can provide valuable insights into component selection for optimized Lightroom performance. For Mac users seeking a powerful, ready-to-go solution, machines like the iMac Pro, equipped with robust internal components, offer an excellent platform for demanding photo editing tasks.
Further Information and Resources
Implementing these tips can lead to a substantial improvement in your Lightroom workflow. For those seeking a deeper understanding of RAW processing and mastery of Adobe Lightroom, consider exploring comprehensive courses such as the "Lightroom Fundamentals Course" offered by SLR Lounge Premium. These resources aim to provide an A-Z guide to RAW processing, uncovering advanced techniques and capabilities within Lightroom that users may not have previously realized were possible. By optimizing your software and workflow, you can unlock a more efficient and enjoyable editing experience, ultimately allowing you to focus more on the creative aspects of your photography.