Mastering Audio and Sound Effects in Adobe After Effects: A Comprehensive Guide for Motion Designers

Adobe After Effects is universally recognized as the industry standard for motion graphics, visual effects, and compositing, yet it is rarely the primary tool of choice for dedicated audio engineering. For decades, video editors and motion designers have leaned toward specialized digital audio workstations (DAWs) like Adobe Audition or Pro Tools for heavy sound design, mixing, and mastering. Nevertheless, modern motion design workflows frequently demand that animators handle basic sound integration, precise audio timing, and dynamic sound effects directly within their compositing software. Understanding how to efficiently manage soundscapes inside After Effects can save creative professionals valuable time, bridging the gap between visual rhythm and auditory execution without requiring a round-trip export to an external editor.
Understanding the Essential Audio Panels and Interface Setup
To successfully work with sound inside After Effects, artists must first familiarize themselves with the dedicated interface panels designed to monitor and control playback behavior. Unlike video streams, which render predictably across timelines, audio requires specific hardware routing and buffer management to ensure real-time playback accuracy.
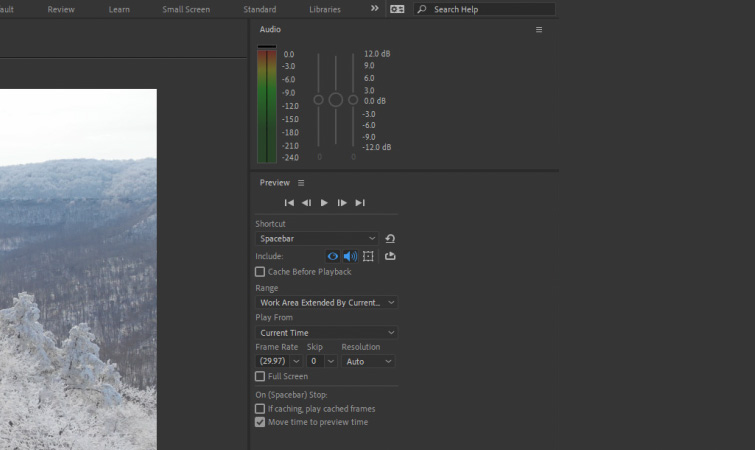
The primary interface tool for monitoring levels is the Audio Panel, accessible by navigating to Window > Audio. This panel displays the dynamic sound levels for any audio track playing within the active composition. While it functions primarily as a visual meter rather than a comprehensive mixing console, it allows creators to adjust the overall playback gain. It is crucial to note that adjustments made within this panel affect only the playback preview audio and do not inherently alter the master export volume of the underlying layers.

Complementing the Audio Panel is the Preview Panel, found under Window > Preview. This control center governs how compositions are previewed in real time. Animators frequently encounter situations where video plays smoothly, but audio remains silent during a timeline scrub. The Preview Panel allows users to toggle audio previewing on and off, ensuring that the sound engine initializes properly alongside the video cache. Configuring these two panels correctly lays the technical foundation for synchronizing complex motion graphics to a musical score or sound effect library.
Essential Keyboard Shortcuts and Workflow Optimization
Efficiency in motion design relies heavily on muscle memory and keyboard shortcuts. Navigating audio layers without proper shortcuts can severely slow down a production pipeline. After Effects offers several vital keystrokes specifically tailored for audio manipulation and timeline navigation.
The standard Spacebar acts as the universal preview trigger, provided that audio playback is explicitly enabled within the Preview Panel. However, for complex compositions containing heavy effects and unrendered graphics, the standard spacebar preview often results in audio dropouts or stuttering playback. To combat this, professionals rely on the numeric keypad. Pressing "0" on the numeric keypad initiates a RAM Preview, forcing the software to cache both video frames and audio data into the computer’s random-access memory, ensuring synchronized playback.
When an artist needs to focus exclusively on sound design without the distraction of rendering heavy visual frames, pressing the period key (".") on the numeric keypad initiates an Audio-Only preview. This command bypasses the video rendering engine entirely, playing back solely the audio tracks across the timeline.
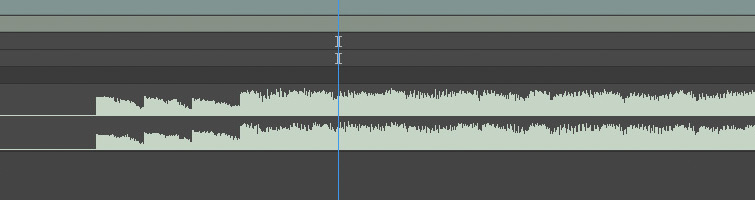
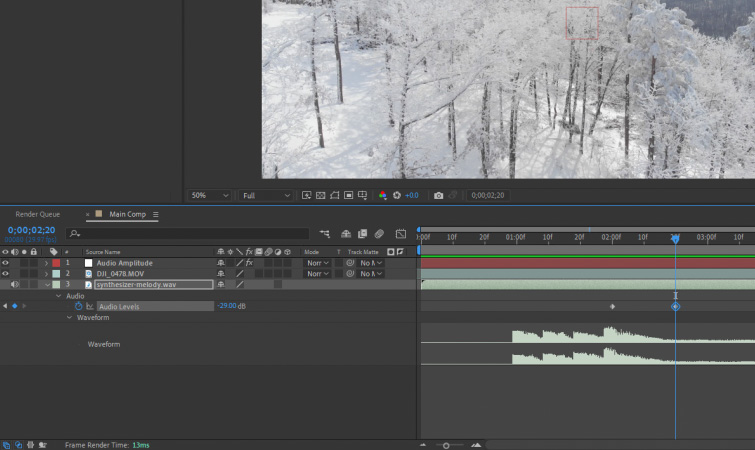
Furthermore, pinpointing specific audio cues requires inspecting the physical sound wave. By selecting an audio layer on the timeline and quickly pressing the "L" key twice, After Effects instantly toggles open the Audio Waveform property. This shortcut eliminates the cumbersome process of manually expanding nested drop-down menus, allowing designers to immediately visualize peaks, troughs, and transients.
Navigating Compositional Audio Editing and Waveform Synchronization
Adding an audio file to an After Effects composition is as straightforward as dragging and dropping the asset from the Project Panel onto the timeline. Once imported, each audio layer features a dedicated speaker icon on the far left, enabling users to instantly mute or unmute individual tracks during the review process. Expanding the layer reveals foundational properties, including Audio Levels measured in decibels and the visual Waveform.
Animators can utilize keyframes on the Audio Levels property to automate volume changes, such as executing clean audio fade-ins at the beginning of a sequence or fade-outs at the conclusion. As volume keyframes are adjusted, the visual waveform dynamically scales to reflect the gain changes, offering immediate visual confirmation of the edits.
A persistent challenge faced by After Effects operators is audio latency. During standard timeline playback, the audio engine often suffers from a microscopic processing delay compared to the video stream. Consequently, editors attempting to synchronize visual motion graphics—such as kinetic typography or geometric transitions—to the exact beat of a song by ear often find their animations lagging behind the actual music. To achieve frame-accurate synchronization, professionals must bypass real-time auditory playback entirely. Instead, designers should rely exclusively on the visual peaks of the audio waveform to place markers and time their keyframes, ensuring flawless synchronization between sight and sound.
Built-in Audio Effects and Limitations in After Effects
While After Effects is primarily built for visual compositing, Adobe has included a suite of basic audio filters located under Effects > Audio. These tools are designed to handle minor adjustments without forcing the user to leave the application. Among the available effects are Bass & Treble for basic equalization, Reverb to simulate acoustic spaces, and Stereo Mixer for channel balancing.
Industry veterans generally advise caution when relying on these native effects for final delivery. The audio processing capabilities within After Effects are rudimentary compared to dedicated software like Adobe Audition, which offers advanced spectral repair, noise reduction, and precise parametric equalization. Nevertheless, having access to basic audio effects directly inside the timeline proves invaluable in fast-paced production environments when minor tweaks are required on rough cuts or client review drafts.
Advanced Techniques: Converting Audio to Keyframes
One of the most powerful and widely utilized audio-driven features in After Effects is the ability to translate audio waveforms into programmable keyframe data. This capability allows motion designers to procedurally link visual parameters—such as scale, position, opacity, or particle emission rates—directly to the rhythm and intensity of a soundtrack, creating reactive visualizers and dynamic motion graphics.
To generate this data, an artist right-clicks the audio file within the active composition, navigates to Keyframe Assistant, and selects Convert Audio to Keyframes. This process commands the software to analyze the frequency and amplitude of the audio file, automatically generating a new Null Object layer designated as Audio Amplitude.
Upon selecting this Null Object, the Effect Controls panel reveals three distinct sliders containing dynamically generated keyframe data: Left Channel, Right Channel, and Both Channels. By opening the Graph Editor, designers can inspect the fluctuating numerical values driven by the audio track. Through simple expression linking (such as the standard pick-whip tool), these keyframed values can be parented to virtually any property in the composition, enabling automated, audio-reactive animations that pulse, shake, or scale in real time with the music.
Broader Implications and Industry Best Practices
The integration of audio tools within motion graphics software highlights the evolving demands placed on modern multimedia creators. In the contemporary digital landscape, clients increasingly expect multidisciplinary competency, where motion designers are tasked with delivering polished audiovisual packages rather than silent graphic loops.
While dedicated audio engineers and sound designers will always advocate for specialized post-production pipelines, mastering the audio feature set within After Effects empowers solo creators and small production teams to work with greater autonomy and speed. By leveraging waveform analysis, keyboard shortcuts, and audio-to-keyframe conversion, professionals can elevate the production value of their motion design projects, ensuring that visual storytelling and sound design work in seamless, synchronized harmony.